Maintaining a clean fan coil unit is essential for ensuring optimal performance and a healthy indoor environment. Over time, dust, dirt, and other debris can accumulate in fan coil units, affecting their efficiency and the air quality in your home.
Maintaining a clean
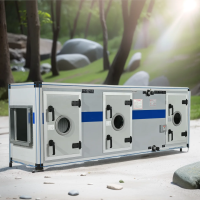
fan coil unit is essential for ensuring optimal performance and a healthy indoor environment. Over time, dust, dirt, and other debris can accumulate in fan coil units, affecting their efficiency and the air quality in your home. Regular cleaning can help extend the lifespan of your unit and improve its functionality. Here’s a simple guide on how to clean your fan coil unit easily at home.
Why Regular Cleaning is Important
Fan coil units circulate air throughout your home, and a dirty unit can spread dust and allergens, negatively impacting indoor air quality. Additionally, a clogged unit has to work harder, leading to increased energy consumption and potential damage. Regular cleaning helps maintain efficient operation, reduces energy costs, and ensures cleaner air, making it a crucial part of home maintenance.
Steps to Clean Your Fan Coil Unit
1.Turn Off the Power: Before starting any cleaning, ensure that the unit is completely powered off. This step is vital for safety to avoid electrical accidents.
2.Remove the Cover: Depending on your unit’s design, you may need to unscrew or simply lift the cover off. Check the manufacturer’s instructions if you are unsure how to remove it. Gently place the cover aside.
3.Vacuum the Interior: Use a vacuum cleaner with a soft brush attachment to remove dust and debris from the interior components, including
the fan blades and coil. Be gentle to avoid damaging delicate parts.
4.Clean the Coils: Spray a coil cleaner solution onto the coils. Allow it to sit for a few minutes to dissolve dirt and grime. Then, use a soft brush to scrub the coils lightly. Wipe away any remaining cleaner with a damp cloth. This process ensures that the coils are free of buildup, which can impede airflow.
5.Wipe Down the Fan Blades: Fan blades can accumulate dust over time. Wipe them down with a damp cloth to remove any dirt. Be careful not to bend or damage the blades during cleaning.
6.Check and Clean the Drain Pan: The drain pan collects condensation and can develop mold or mildew if not cleaned regularly. Remove the drain pan, wash it with soap and water, and let it dry completely before placing it back.
7.Replace or Clean the Filters: Filters play a crucial role in trapping dust and allergens. If your unit uses disposable filters, replace them with new ones. If your unit has reusable filters, clean them according to the manufacturer’s instructions and ensure they are dry before reinstalling.
8.Reassemble the Unit: Once all parts are clean and dry, carefully reassemble the unit. Make sure all screws are securely fastened, and the cover is properly aligned.
9.Turn the Power Back On: Finally, turn the power back on and test the unit to ensure it is operating smoothly.
Tips for Maintaining Your Fan Coil Unit
Regular Cleaning Schedule: Set a regular cleaning schedule, ideally every three to six months, depending on usage and environment.
Inspect for Damage: During each cleaning, check for any signs of damage or wear. Early detection can prevent costly repairs.
Professional Maintenance: Consider hiring a professional technician for a thorough inspection and deep cleaning annually. They can check for issues you might miss and ensure optimal performance.
Conclusion
Cleaning your fan coil unit at home doesn’t have to be a daunting task. With the right tools and a bit of time, you can keep your unit running efficiently and maintain a healthier indoor environment. Regular maintenance not only improves air quality but also extends the lifespan of your unit, making it a worthwhile investment for any homeowner.